There are some changes to our formula in 6.2.3
Due to the valor upgrades, our class receive around 8% buff to CS, J, HoW, TV, FV, SoT and Censure. I heard the main reason is because other classes scale better with higher item-level and this buff will help us to be on par with them.
Most of the formula I tested seems to be correct except these 3 skills:
Hammer of Wrath - My testing show accurate result at 240% instead of 259.2%
Hammer of the Righteous - My testing show accurate result at 41% physical instead of 42%. But the holy damage is perfectly fine.
Execution Sentence - My testing show accurate result at 867.60% instead of 914.20%
Character Stats
This is the stats i used during my testing & calculations:
Strength = 7357
Versatility = 3.00%
Weapon Speed = 3.60
Weapon Damage (Lowest) = 2408
Weapon Damage (Highest) = 3613
Additional Notes
If you want to test out the formulas yourself, remember to remove items that have a proc effect such as Spellbound Runic Band of Elemental Power.
I've tested on the Garrison Dummy (Level 102) for hours and the estimated armor physical reduction for the dummy is around 33.3%
Note: 1 Strength = 1 Attack Power = 1 Spell Power
Attack power increases your base DPS by 1 for every 3.5 attack power
Crit = 2 times normal damage. If you are a tauren (racial buff crit by 2%), then Crit = 2.04 times normal damage
Sword of Light is a passive 30% buff that affects most of our abilities when we are wielding a 2-hander weapon
Melee Auto Attack
100% Weapon Damage as Physical Damage
Physical damage takes into consideration of target armor reduction
Formula = ((Attack_Power ÷ 3.5 x Weapon_Speed) + Weapon_Damage) x Versatility x Sword_Of_Light x Armor_Reduction
Lowest = ((7357 ÷ 3.5 x 3.6) + 2408) x 1.03 x 1.3 x 0.667 = 8908.98
Highest = ((7357 ÷ 3.5 x 3.6) + 3613) x 1.03 x 1.3 x 0.667 = 9985.18
After testing, result shows my melee auto attack damage between 8906 to 9968
Crusader Strike
130% Weapon Damage as Physical Damage
2H Weapon Normalization is 3.3
Physical damage take into consideration of target armor reduction
Formula = ((Attack_Power ÷ 3.5 x Weapon_Normalize) + Weapon_Damage) x Versatility x Crusader_Strike_130% x Sword_Of_Light x Armor_Reduction
Lowest = ((7357 ÷ 3.5 x 3.3) + 2408) x 1.03 x 1.3 x 1.3 x 0.667 = 10848.52
Highest = ((7357 ÷ 3.5 x 3.3) + 3613) x 1.03 x 1.3 x 1.3 x 0.667 = 12248.58
After testing, result shows my crusader strike damage between 10848 to 12223
Final Verdict
Tooltip is not updated until another patch.
259.2% Weapon Damage as Holy Damage
2H Weapon Normalization is 3.3
Holy damage ignore armor
Formula = ((Attack_Power ÷ 3.5 x Weapon_Normalize) + Weapon_Damage) x Versatility x Final_Verdict_259.2% x Sword_Of_Light
Lowest = ((7357 ÷ 3.5 x 3.3) + 2408) x 1.03 x 2.592 x 1.3 = 32432.19
Highest = ((7357 ÷ 3.5 x 3.3) + 3613) x 1.03 x 2.592 x 1.3 = 36614.37
After testing, result shows my final verdict damage between 32413 to 36559
Templar Verdict
259.2% Weapon Damage as Physical Damage
2H Weapon Normalization is 3.3
Physical damage takes into consideration of target armor reduction
Formula = ((Attack_Power ÷ 3.5 x Weapon_Normalize) + Weapon_Damage) x Versatility x Templar_Verdict_259.2% x Sword_Of_Light x Armor_Reduction
Lowest = ((7357 ÷ 3.5 x 3.3) + 2408) x 1.03 x 2.592 x 1.3 x 0.667 = 21632.27
Highest = ((7357 ÷ 3.5 x 3.3) + 3613) x 1.03 x 2.592 x 1.3 x 0.667 = 24421.78
After testing, result shows my final verdict damage between 21653 to 24369
Exorcism
168.6% of Spell Power as Holy Damage
Holy damage ignore armor
Abilities that use Spell Power ignore our weapon
Formula = Spell_Power x Versatility x Exorcism_168.6%
Damage = 7357 x 1.03 x 1.686 = 12776.02
After testing, result shows my exorcism damage is 12777
Judgement
62.208% of Spell Power + 75.168% of Attack Power as Holy Damage
Holy damage ignore armor
Judgement% = 62.208% + 75.168% = 137.376%
Abilities that use Spell Power ignore our weapon
Formula = Spell_Power x Versatility x Judgement_137.376% x Sword_Of_Light
Damage = 7357 x 1.03 x 1.37376 x 1.3 = 13532.94
After testing, result shows my judgement damage is 13534
Hammer of Wrath
For some reason, HoW is still at 240% and not 259.2%
240% of Spell Power as Holy Damage
Holy damage ignore armor
Abilities that use Spell Power ignore our weapon
Formula = Spell_Power x Versatility x Hammer_Of_wrath_240% x Sword_Of_Light
Damage = 7357 x 1.03 x 2.4 x 1.3 = 23642.46
After testing, result shows my hammer of wrath damage is 23643
Divine Storm
86% Weapon Damage as Holy Damage
2H Weapon Normalization is 3.3
Holy damage ignore armor
Final Verdict Divine Storm (FVDS) = 86% x 2 = 172%
Empowered FVDS = 172% x 1.5 = 258%
Formula = ((Attack_Power ÷ 3.5 x Weapon_Normalize) + Weapon_Damage) x Versatility x Divine_Storm_258% x Sword_Of_Light
Lowest = ((7357 ÷ 3.5 x 3.3) + 2408) x 1.03 x 2.58 x 1.3 = 32432.19 or 32282.04
Highest = ((7357 ÷ 3.5 x 3.3) + 3613) x 1.03 x 2.58 x 1.3 = 36614.37 or 36444.86
After testing, result shows my Empowered-FVDS damage between 32450 to 36359
Execution Sentence
914.20% of Spell Power as Holy Damage over 10 tick
Holy damage ignore armor
Abilities that use Spell Power ignore our weapon
I have difficulties testing out this ability.
Although the tooltip indicate that it is 914.20%, I got the most accurate result using 867.60% instead of 914.20%
Formula = Spell_Power x Versatility x Execution_Setence_867.60%
Damage = 7357 x 1.03 x 8.676 = 65744.21
Light's Hammer
Arcing Light 86% of Spell Power as Holy Damage every tick
Holy damage ignore armor
Abilities that use Spell Power ignore our weapon
Formula = Spell_Power x Versatility x Arcing_Light_86%
Damage = 7357 x 1.03 x 0.86 = 6516.83
After testing, result shows my arcing light damage is 6517 to 6520
Hammer of the Righteous (Physical)
41% Weapon Damage as Physical Damage
2H Weapon Normalization is 3.3
Physical damage take into consideration of target armor reduction
Formula = ((Attack_Power ÷ 3.5 x Weapon_Normalize) + Weapon_Damage) x Versatility x HOTR_41% x Sword_Of_Light x Armor_Reduction
Lowest = ((7357 ÷ 3.5 x 3.3) + 2408) x 1.03 x 0.41 x 1.3 x 0.667 = 3421.77
Highest = ((7357 ÷ 3.5 x 3.3) + 3613) x 1.03 x 0.41 x 1.3 x 0.667 = 3863.01
After testing, result shows my HOTR physical damage between 3447 to 3822
Hammer of the Righteous (Holy)
24% Weapon Damage as Holy Damage
2H Weapon Normalization is 3.3
Holy damage ignore armor
Formula = ((Attack_Power ÷ 3.5 x Weapon_Normalize) + Weapon_Damage) x Versatility x HOTR_24% x Sword_Of_Light
Lowest = ((7357 ÷ 3.5 x 3.3) + 2408) x 1.03 x 0.24 x 1.3 = 3002.98
Highest = ((7357 ÷ 3.5 x 3.3) + 3613) x 1.03 x 0.24 x 1.3 = 3390.22
After testing, result shows my HOTR holy damage between 3004 to 3389
Seal of Truth
13% Weapon Damage as Holy Damage
Holy damage ignore armor
This ability use weapon speed instead of weapon normalization
Formula = ((Attack_Power ÷ 3.5 x Weapon_Speed) + Weapon_Damage) x Versatility x Seal_Of_Truth_13% x Sword_Of_Light
Lowest = ((7357 ÷ 3.5 x 3.6) + 2408) x 1.03 x 0.13 x 1.3 = 1736.38
Highest = ((7357 ÷ 3.5 x 3.6) + 3613) x 1.03 x 0.13 x 1.3 = 1946.14
After testing, result shows my seal of truth damage between 1736 to 1945
Censure
1 stack = 6.67181% of Spell Power as Holy Damage
5 stack = 33.35905% of Spell Power as Holy Damage
Holy damage ignore armor
Censure ignore our weapon
Formula = Spell_Power x Versatility x Censure_33.35905%
Damage = 7357 x 1.03 x 0.3335905 = 2527.85
After testing, result shows my 5-stack censure damage is 2528
Seal of Righteous
12% Weapon Damage as Holy Damage
2H Weapon Normalization is 3.3
Holy damage ignore armor
Formula = ((Attack_Power ÷ 3.5 x Weapon_Normalization) + Weapon_Damage) x Versatility x Seal_Of_Righteous_12% x Sword_Of_Light
Lowest = ((7357 ÷ 3.5 x 3.3) + 2408) x 1.03 x 0.12 x 1.3 = 1501.49
Highest = ((7357 ÷ 3.5 x 3.3) + 3613) x 1.03 x 0.12 x 1.3 = 1695.11
After testing, result shows my seal of truth damage between 1501 to 1695
Thursday, 26 November 2015
Monday, 23 November 2015
Mythic Archimonde Kill - Realm First

yes, we finally kill mythic archimonde. when a demon died inside the twisting nether, he is dead for good! another good news is that we are also realm first :)
Spec: Final Verdict vs Seraphim
i believe Final Verdict is a better choice for progression because there are many high priority targets that need to die asap and we must prepare to use AW immediately once they are spawned.
for example:
during phase 1, doomfire must die in 10 seconds.
during phase 3, infernals must die in 10 seconds.
doomfire spawn every 50 seconds so it's not going to be efficient for seraphim timing.
infernal spawn every 60 seconds but there are many things happening during the last phase. i think it's too challenging to do a perfect seraphim for this phase. besides, 3 to 5 infernals spawn together, and is very good for final verdict to cleave once.
Spec: Hand of Purity vs Unbreakable Spirit vs Clemency
during the first 2 weeks, i was using Hand of Purity because we have to soak 3 doomfires. eventually our dps reach the point where we can clear phase 1 with only 2 doomfires, our healers are capable of soaking the doomfire within themselves.
so i switch to Unbreakable Spirit in order to have more CD for survival. the fight will take around 9-10 minutes for first kill, which means 3 Divine Shield, 2 Lay on Hands, and Divine Protection for every Wrought Chaos and every infernal drop. our damage taken for this boss is always significantly lower than the other raiders.
although the tank also need my Hand of Sacrifice, we have enough external CD which does not need me to spec for clemency.
DPS Priority
phase 1: doomfire > archimonde > cleave deathcaller
doomfire must die in 10 seconds otherwise there will be too much fire to soak. ideally, we want our soakers to take around 12 stacks or less so that our healers won't be so stressed throughout phase 1 and phase 2.
phase 2: deathcaller > overfiend > archimonde
this is the hardest phase, most chaotic, and there are many deathstalkers in phase 2 which i can cleave on them as well.
phase 3: infernals > void stars > source of chaos > archimonde
all the dps priority, especially infernals, has to be killed very quickly here and target switching needs to be fast.
/cleartarget
/tar doom
/stopmacro [nodead, harm]
/tar hellfire
/stopmacro [nodead, harm]
/tar felborne
/stopmacro [nodead, harm]
/tar infernal
/stopmacro [nodead, harm]
/tar source
/stopmacro [nodead, harm]
/tar void
/stopmacro [nodead, harm]
/tar archi
Hardest Phase 2
i think the hardest part of the fight is during phase 2. it is very important to recognize the sequence of events that is going to happen and always plan ahead where to move.
wrought chaos - look at addon to position myself
shackle - happen after wrought chaos, move out immediately.
deathcaller - legend ring and burst it down or (hand of purity if you are assigned)
wrought chaos - looking at addon to position myself
shackle - happen during wrought chaos, plan ahead which direction to run
deathcaller - focus and cleave off him or (hand of purity if you are assigned)
shackle - all 3 players must break these shackles before the next wrought chaos so everyone has to move out ASAP, in the shortest direction possible!
wrought chaos - immediately after the previous shackle, have to be more careful of positioning because everyone is running back into the boss again.
deathcaller - focus and cleave off him or (hand of purity if you are assigned)
shackle - we do not break this one, instead we push boss into the final phase.
AW Planning
AW planning depends on guild strategy. for my guild, we plan for 2 doom fire in phase 1. priority targets are extremely dangerous for this fight so i need to plan all my Avenging Wrath for them.
1st AW + 1st Ring = when archimonde is pulled, 1st doom fire will die in a few seconds
2nd AW = when 2nd doom fire spawn
3rd AW + 2nd Ring = when our ring is ready and a deathcaller is spawned
then i save up my AW until the last phase...
4th AW + 3rd Ring = 1st set of infernals
5th AW + 4th Ring = 3rd set of infernals
6th AW = 4th set of infernals
7th AW = immediately after 6th AW
by the end of 7th AW, archimonde should be almost dead already.
Trinkets: Empty Drinking Horn & Gronntooth War Horn
i believe when archimonde is on farm, EDH and libram should be the best combo.
but for progression, i am much more comfortable using the heirloom trinket because of all the targets switching. heirloom trinket uptime is as good as unending hunger and in addition, it also came with a 10% buff when hitting demon.
Thursday, 19 November 2015
Progressing Mythic Archimonde
this is the beginning of the 3rd week progression and we are coming close to a 100 wipes on mythic archimonde.
Changing Strategy
during the first week, we are planning for 3 doomfires in phase1 because most guild did 3 doomfires for their first kill too. due to our current gears and legend ring, we need to stop dps at 86% hp, then wait for the shadowfel burst, and push below 85% so that archimonde will use 2nd desecrate instead and further delay the 2nd doomfire. we practise this 3 doomfires strategy for the whole week and managed to progress into phase2.
during the second week, we decided to plan for 2 doomfires because we feel that dps have improved after 1 more week of farming, in addition, we also cut 1 healer (down to 3 healers now), and using bloodlust on pull, we wanted to push the boss to phase2 before the 3rd doomfire appear. this new strategy was quite unstable because sometimes we managed to push, and sometimes we fail, making no progress for the week.
(yesterday) during the third week, valor upgrade arrives, we decided to upgrade our legend ring and farm all the LFR raids in highmaul, blackrock, hellfire as a guild. it was boring but bosses die in a few seconds and we managed to clear all the LFR within 1.5 hours. we earn around 1250 valor points so i use it to upgrade my mythic weapon and also my mythic EDH trinket. after that, we extend the raid lockout and try to progress on mythic archimonde again. to our surprise, the valor upgrades help a great deal and we are able to do the 2 doomfires strategy in a much stable way. this give us a lot of opportunity to practise p2.
Sequence of Events
for progression on a very difficult boss with over 100 wipes, i will usually memorise all the sequence of events in my brain. consistency is very important because always doing the same thing in the same way will makes one better at doing it. this means using the same CD at the same time, being in the same position each time, eventually all these will become a part of me. practise makes perfect and when everything is already in my muscle memory, my dps rotation will improve, target switching will be fast, environment awareness will be good, etc.
writing it down can be another way help me remember too.
Phase One
on pull - potions, light hammer, ring, avenging wrath, trinket
doomfire - continue focus on boss, only rogues and hunters switch
deathcaller - continue focus on boss, cleave using FV divine storm
desecration - avoid getting hit but stay close to an orb for the buff
shadowfel burst - this mechanics is only for range, but as melee, when i see these 3 purple swirling circles on the floor, i can mentally prepare myself to avoid getting hit by the next desecration.
desecration - if this happen, we made the dps check for 85%
doomfire - everyone must switch and kill it asap, i'll also use avenging wrath for this doomfire
deathcaller - use light's hammer, refresh orb buff, then push archimonde down to 71%, and kill this deathcaller
doomfire - if this doom fire happens, we fail the 2 doomfire strategy and have to wipe
Phase Two
wrought chaos - minimize movement to achieve good position, and use divine protection if in a bad positioning with low hp
shackle - forget about dps and run out in the shortest direction asap
doomfire soak - run to the hunter i am assigned to and cast hand of purity
deathcaller - ring, avenging wrath, potions, trinket, kill it very fast
wrought chaos & shackle - very deadly combo, divine shield may be needed here, in addition there are also many dreadstalkers running around at this time, while wrought chaos is going on in this very chaotic situation, i must already plan ahead for the direction to run out from shackle by looking at the addon.
doomfire soak - run to the hunter i am assigned to and cast hand of purity
wrought chaos - trying to get back to boss carefully
shackle - this one kill me a few times because i always feel a bit dis-oriented due to running back and fro
doomfire soak - run to the hunter i am assigned to and cast hand of purity
wrought chaos & shackle & doomfire soak - this is a killer combo, and our strategy to avoid this is by pushing archimonde to 40% asap
Phase Three
we only reach p3 a couple times, not enough practise yet
Thursday, 12 November 2015
Mythic Mannoroth - Retribution Paladin
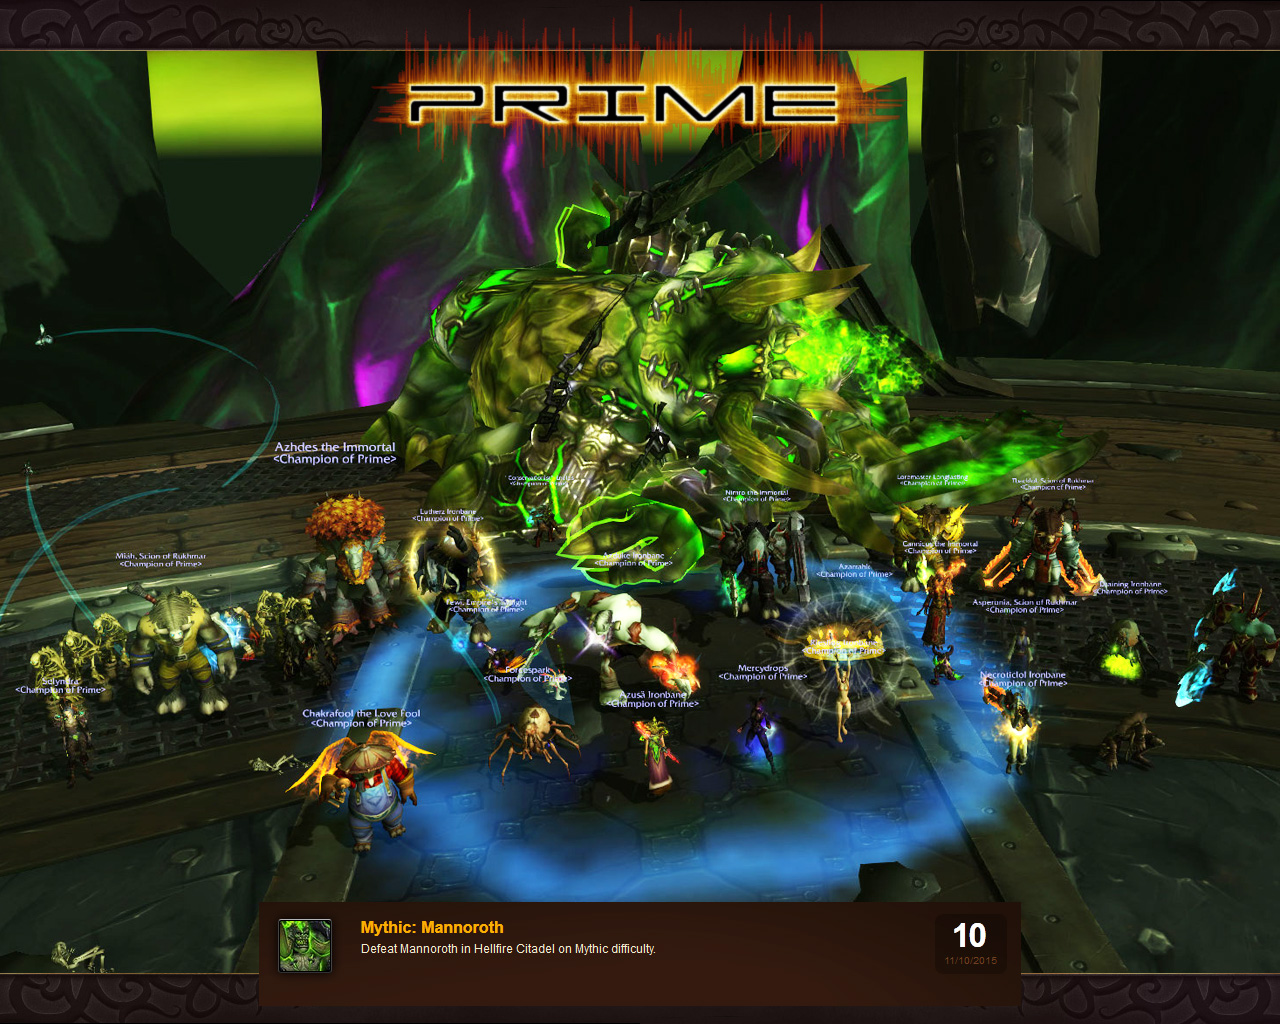
yup, we are 12/13M now and this is the 2nd week we down mythic mannoroth.
based on the boss mod statistic, our first kill took us 168 wipes.
surprisingly, the second kill took us only 7 wipes.
Spec: Final Verdict vs Seraphim
Final Verdict is definitely the better choice because for mythic mannoroth, imps continue to spawn throughout the fight. since the imps have to die within a couple GCD, in a way it is very similiar to kromrok dragging hands. for such situation, a FVDS (or FVEDS proc) is the best way to dps.
Spec: Unbreakable Spirit vs Clemency
Unbreakable Spirit is great because everyone will take a lot of damage from this boss. the fight will take around 7-9 minutes, which means 3 Divine Shield, 2 Lay on Hands, and Divine Protection for every imps / Shadowforce. when i can use our defensive CD so often, my damage taken for this boss is always significantly lower than the other raiders.
although the tank also need my Hand of Sacrifice for the Glaive Combo, we have enough external CD to go through it.
DPS Assignment
doom lord > mannoroth and cleave imps
this is the dps priority for the majority of us.
for consistent purpose, our guild prefer to appoint specific classes such as warlocks and warriors to focus AOE on the imps, while the rest of us focus on the doom lord and mannoroth. the main reason is to push the boss to 65% hp before the 4th doom lord, or even better if we push before the 4th set of imps.
Wrath of Gul'dan
Wrath of Gul'dan only happen 2 times in the whole fight because it will happen during phase transitions and there are only 2 phase transitions. and for each phase transition, 5 random players will be selected for wrath. it is always 2 melee-dps, 2 range-dps, 1 healer.
our guild decided that we should only deal with the 1st wrath and it is easier to ignore players who got the 2nd wrath.
for the 1st wrath, the raid leader addon will assign 5 icons on the 5 wrath players. 1 special icon (we use skull) is assigned to a player who will stand alone at the skull marker where both our tanks will then take turns to soak the player's wrath. the other 4 icon players will stand at their own pre-assigned markers forming a square shape. there, we assign 2 mages to take turns and soak up all the wrath of the 4 players by standing in the middle of the square shape formation and using iceblock.
for the 2nd wrath, we decided to ask all the players to stand outside the raid, each on their own. the most dangerous thing in this phase is the Empowered Shadowforce and the whole raid will be cluster at the center lane so that everybody can survive the empowered shadowforce by running against it in a straight line. straight line running is the only way we can survive without falling off the platform. however wrath players who are standing outside the raid means that our pivot direction from the boss will not be a straight line, and we will definitely fall out the platform during empowered shadowforce. as a paladin, we don't have blinks, leap jump, charge, etc but we are still able to survive the first empowered shadowforce using divine shield because there is one pillar remaining in the last phase. this pillar has a very strong electric AOE that can kill us in a few seconds but if we can stay inside the pillar with divine shield, we will be able to survive the first empowered shadowforce without falling off the platform. due to our guild choice of strategy, there is unfortunately no way for me to survive the second shadowforce except to cheat death by stacking up with the rest of the raid, but i'll only consider that if all our healers are alive and the raid looks healthy.
just for example,
during my first kill, i am only 58 percentile because i got the 2nd wrath.
during my second kill, i became 91 percentile because i didn't have the 2nd wrath.
AW Planning
since our role is to focus on doom lord, i decided to plan all my Avenging Wrath around the 5 doom lord.
1st AW + 1st Ring = when mannoroth is pulled
2nd AW = when second doom lord spawn
3rd AW + 2nd Ring = when 3rd imps spawn
4th AW = when fourth doom lord spawn
5th AW + 3rd Ring + Bloodlust + Potion = after clearing the mark from fifth doom lord
6th AW = if i have 2nd wrath, i will use it after the first empowered shadowforce because im probably going to die in the second empowered shadowforce. otherwise, we can save it to be used together with the 4th Ring.
1st Ring is used to dps mannoroth at the beginning and explode on the doom lord shortly after it is spawned.
2nd Ring can be used for dps padding on the 3rd set of imps and then explode on the 3rd doom lord when it is spawned. this explosion should instantly kill the doom lord.
3rd Ring is delayed a little bit, until the mark of doom is cleared and everybody is ready to dps push the boss to the final phase.
4th Ring is probably the end, the boss should be death pretty soon. use it as soon as it is available.
Trinkets: Empty Drinking Horn & Discordant Chorus
i believe the highest dps trinket is EDS + Libram and pray that you never get chosen for mechanics because mark of doom can easily put you out of range and remove the 3 LOV stacks. otherwise, a wrath + shadowforce combo can also push you out of range to maintain 3 LOV stacks.
for personal preference, i prefer to use EDH and DC, understand they may not be the best choice, but it definitely make my life easier, and allow me to focus on the dps targets, dps rotation or reacting to the mechanics correctly.
Edit: in case you were wondering, i did not have unending hunger or heirloom trinket (introduced later in 6.2.3) during our mythic mannoroth progression.
Friday, 6 November 2015
HFC Paladin Raiding Macro
using macro will give a player a slight advantage because you can react faster and with lesser mistake. below are some of the macros i frequently used in HFC.
Hellfire Assault
/cast [@tankname] hand of sacrifice
i usually keep an eye on the tank stacking debuff when the hulking berserker is alive for a long duration. HOS will be needed at 3-5 stacks because that's when tank hp start to dip down fast.
/cleartarget
/tar gorebound terror
/stopmacro [nodead, harm]
/targetenemy
this macro will help me target the nearest gorebound terror. when Gorebound Felcaster is at low health, they transformed into gorebound terror (the highest priority target).
Iron Reaver
/cast [@longlasting] hand of freedom
during the air phase, the boss will splash oil covering a large area. stepping into the oil will slow you down a lot and a hand of freedom macro can be very useful.
Kormrok
/cast [@tankname] hand of sacrifice
tank sometimes take heavy damage during grasping hand. we don't worry about the 1st hand because it is destroyed by the legendary ring. we only need to use HOS for the 2nd and 3rd grasping hand.
/cast [@focus,exists,nodead,harm] [] crusader strike
while changing target to dps the grasping hand, we have to maintain our 3 LOV stacks by doing a focus macro of crusader strike on the boss.
/cast seal of righteousness
/cast seal of truth
Hellfire Council
/cast seal of righteousness
/cast seal of truth
/cast [@focus,exists,nodead,harm] [] crusader strike
at the beginning, we can focus macro crusader strike on jubei and attack gurtogg as the main target. when gurtogg is dead, we can continue 3 stacks of LOV on jubei.
Gorefiend
/cast [@longlasting] hand of freedom
there are times when the torture essence come out and AOE slow everyone, hand of freedom is especially important when you are required to deal with Shared Fate or Touch of Doom at the moment.
/cleartarget
/tar gorebound
/stopmacro [nodead, harm]
/tar gorefiend
/stopmacro [nodead, harm]
/targetenemy
this macro will help me target the nearest gorebound construct/essence/spirit, otherwise it will target boss gorefiend himself.
Shadow-Lord Iskar
/cleartarget
/tar corrupted talon
/stopmacro [nodead, harm]
/tar fel raven
/stopmacro [nodead, harm]
/tar shadowfel
/stopmacro [nodead, harm]
/tar shadow-lord
i use a different version for mythic mode but this is the priority kill order for heroic mode. it help save time with a macro to choose the next priority kill target
/click ExtraActionButton1
/targetlasttarget
i prefer to use this macro instead of the iskar assist addon because the addon can easily cause mistakes to happen.
/cast seal of righteousness
/cast seal of truth
best macro for switching between SOR and SOT
Scorethar
/cast [@longlasting] hand of freedom
hand of freedom will be mainly for p1 when the boss use fel charge. it leave behind a line of fire which slow down your walking speed. with a hand of freedom, you can walk over it safely.
/cleartarget
/tar sargerei dominator
/stopmacro [nodead, harm]
/tar soul of socrethar
/stopmacro [nodead, harm]
/targetenemy
help me target the dominator when it spawn, otherwise it will target the boss.
Xhul'horac
/cleartarget
/tar wild pyromaniac
/stopmacro [nodead, harm]
/tar vanguard akkelion
/stopmacro [nodead, harm]
/tar omnus
/stopmacro [nodead, harm]
/tar xhul
it save time having a macro that choose targets for me.
/cast [@tankname] hand of sacrifice
the tank always need to use some CD (whether internal or external) for every Fel Strike
Tyrant Velhari
/tar ancient harbinger
/focus
/targetlasttarget
during p2, melee has to focus dps on the boss and at the same time we also need to interrupt the p2 add. to do this, i use this macro when the p2 add is spawned and it will put the p2 add as my focus target.
/cast [@focus,exists,nodead,harm] [] rebuke
i can go full dps on the boss and use this macro to interrupt the p2 add, which is already my focus target now.
/cast [@tankname] hand of sacrifice
HOS is needed mainly for p3 where tank death is the most common wipe because of the stacking debuff.
/cast seal of righteousness
/cast seal of truth
best macro for switching between SOR and SOT.
Mannoroth
/cast [@tankname] hand of sacrifice
wait for tank to call for HOS when mannoroth is about to do his Glaives Combo
/cleartarget
/tar doom lord
/stopmacro [nodead, harm]
/tar mannoroth
this macro to help me target the doom lord when it is spawned. if there's no doom lord alive, boss mannoroth is selected.
Archimonde
/cleartarget
/tar doomfire spirit
/stopmacro [nodead, harm]
/tar hellfire
/stopmacro [nodead, harm]
/tar felborne
/stopmacro [nodead, harm]
/tar infernal
/stopmacro [nodead, harm]
/tar archimonde
macro the priority kill order to make my life easier.
/cast seal of righteousness
/cast seal of truth
best macro for switching between SOR and SOT.
Hellfire Assault
/cast [@tankname] hand of sacrifice
i usually keep an eye on the tank stacking debuff when the hulking berserker is alive for a long duration. HOS will be needed at 3-5 stacks because that's when tank hp start to dip down fast.
/cleartarget
/tar gorebound terror
/stopmacro [nodead, harm]
/targetenemy
this macro will help me target the nearest gorebound terror. when Gorebound Felcaster is at low health, they transformed into gorebound terror (the highest priority target).
Iron Reaver
/cast [@longlasting] hand of freedom
Kormrok
/cast [@tankname] hand of sacrifice
/cast [@focus,exists,nodead,harm] [] crusader strike
while changing target to dps the grasping hand, we have to maintain our 3 LOV stacks by doing a focus macro of crusader strike on the boss.
/cast seal of righteousness
/cast seal of truth
this is the best macro for switching between SOR and SOT.
Hellfire Council
/cast seal of righteousness
/cast seal of truth
this is the best macro for switching between SOR and SOT. SOR is good for the beginning when we have 2 targets available. after gurtogg is dead, we can switch to SOT.
/cast [@focus,exists,nodead,harm] [] crusader strike
Gorefiend
/cast [@longlasting] hand of freedom
/cleartarget
/tar gorebound
/stopmacro [nodead, harm]
/tar gorefiend
/stopmacro [nodead, harm]
/targetenemy
Shadow-Lord Iskar
/cleartarget
/tar corrupted talon
/stopmacro [nodead, harm]
/tar fel raven
/stopmacro [nodead, harm]
/tar shadowfel
/stopmacro [nodead, harm]
/tar shadow-lord
/click ExtraActionButton1
/targetlasttarget
/cast seal of righteousness
/cast seal of truth
best macro for switching between SOR and SOT
Scorethar
/cast [@longlasting] hand of freedom
hand of freedom will be mainly for p1 when the boss use fel charge. it leave behind a line of fire which slow down your walking speed. with a hand of freedom, you can walk over it safely.
/cleartarget
/tar sargerei dominator
/stopmacro [nodead, harm]
/tar soul of socrethar
/stopmacro [nodead, harm]
/targetenemy
help me target the dominator when it spawn, otherwise it will target the boss.
Xhul'horac
/cleartarget
/tar wild pyromaniac
/stopmacro [nodead, harm]
/tar vanguard akkelion
/stopmacro [nodead, harm]
/tar omnus
/stopmacro [nodead, harm]
/tar xhul
/cast [@tankname] hand of sacrifice
the tank always need to use some CD (whether internal or external) for every Fel Strike
Tyrant Velhari
/tar ancient harbinger
/focus
/targetlasttarget
/cast [@focus,exists,nodead,harm] [] rebuke
/cast [@tankname] hand of sacrifice
HOS is needed mainly for p3 where tank death is the most common wipe because of the stacking debuff.
/cast seal of righteousness
/cast seal of truth
best macro for switching between SOR and SOT.
Mannoroth
/cast [@tankname] hand of sacrifice
wait for tank to call for HOS when mannoroth is about to do his Glaives Combo
/cleartarget
/tar doom lord
/stopmacro [nodead, harm]
/tar mannoroth
this macro to help me target the doom lord when it is spawned. if there's no doom lord alive, boss mannoroth is selected.
Archimonde
/cleartarget
/tar doomfire spirit
/stopmacro [nodead, harm]
/tar hellfire
/stopmacro [nodead, harm]
/tar felborne
/stopmacro [nodead, harm]
/tar infernal
/stopmacro [nodead, harm]
/tar archimonde
/cast seal of righteousness
/cast seal of truth
best macro for switching between SOR and SOT.
Subscribe to:
Posts (Atom)